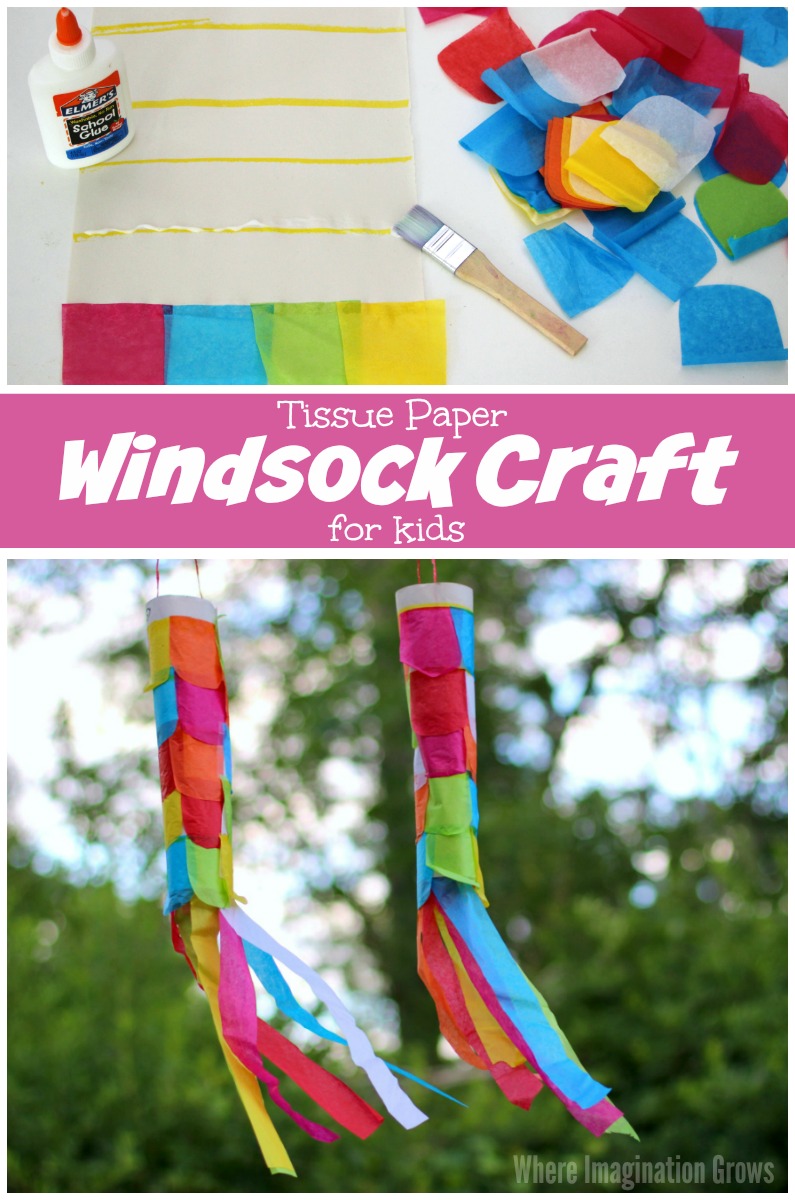
Let’s make a windsock craft for your patio!
Simple crafts like these are some of our favorite summer crafts for kids! They are fun for the kids to make and we can hang them up, making them part of our outdoor environment! The kids love to see their windsock craft flying in the wind as they play outside.
Do you have tissue paper and some glue? If so, get them out and get started! We always have a stockpile of tissue paper because it’s one of those craft supplies that are super affordable most dollar stores sell it in multi-color packs for $1.
This craft is engaging for kids of all ages, from toddlers to school age, and it works on a variety of skills. Cutting and squeezing glue is a great fine motor activity for kids, plus they can learn colors, color mixing, and pattern-making skills.
Below is our full, step-by-step tutorial on how to make this colorful kid’s craft.

Materials needed for this tissue paper windsock craft:
- Tissue Paper
- Construction Paper
- Glue
- Scissors
- String or Yarn
- Paint Brush (optional)
- Tape (optional)

The first step is to cut your tissue paper into small shapes. These will be what you layer onto your construction paper to make the main portion of your windsock. We cut ours out similar to if we were doing “scales” on a fish craft but you could do any shapes that you want. Cutting is a great fine motor activity for kids.

I used a pen to draw lines across the paper for the kids to use as a guide for the glue. I made sure that the lines were close enough together that the tissue paper would overlap the row below it, giving it a layered look.
The kids squeezed the glue along the lines and then used a paintbrush to spread out the glue. You can do each of the lines at once or as you go, whatever you prefer. Next, starting at the bottom, let the kids add tissue paper in any patterns or designs of their choice. When each line is covered with tissue paper, set it aside and let it dry. If you spread the glue out with a paintbrush, rather than just squeezing out a line of glue, it dries faster.

While we waited for ours to dry we cut long, rectangular strips from tissue paper to be used as the tails of our windsocks. Once it was dry we glued the long sides of the construction paper together creating a “tube” shape.
Next, you want to glue your tissue paper strips to the inside of one end of the tube your created, this creates your windsock tails. The last step is to add some string to the other end so that you can hang your creations. You can also use tape for these last steps to avoid having to wait for it to dry again.

Hang up and enjoy when done! They look so colorful floating in the wind! Plus they are so easy that toddlers to early elementary-aged kids can do them!

Looking for more crafts and activities? Check out our index for 100+ plus kids activities! Find activities by theme, materials, skills, age and much more!


