These salt dough and melted bead ornaments combine homemade dough with colorful plastic beads for a bright, stained-glass look. We made tree and star shapes, then filled the cutout spaces with translucent beads. When the ornaments hang on the Christmas tree, the colors catch the light.
Kids can help mix and roll the dough, choose cookie-cutter shapes, and decide where the beads go. An adult needs to handle the heating step.

Materials
- 1 cup all-purpose flour
- ½ cup salt
- ½ cup water
- Translucent plastic pony beads or tri-beads
- Christmas cookie cutters, such as trees and stars
- Drinking straw
- Rolling pin
- Baking tray and a liner suitable for the temperatures involved
- Ribbon or string for hanging
Safety note about melting beads
This craft involves heating plastic beads. Check the bead manufacturer’s guidance before using beads in an oven or on a grill; don’t heat beads unless the manufacturer says they’re suitable for it. An adult should handle the heating, provide good ventilation, and follow the bead maker’s instructions. If the package doesn’t give heating guidance, choose a no-melt ornament craft instead.
How to Make Salt Dough and Melted Bead Ornaments
1. Mix the salt dough
Add the flour and salt to a bowl and stir them together. Slowly pour in the water, mixing as you go, until a dough forms. Knead the dough until it feels smooth and holds together.
If the dough feels sticky, add a little flour at a time. If it feels dry or crumbly, add a small amount of water and knead again.
2. Roll out the dough
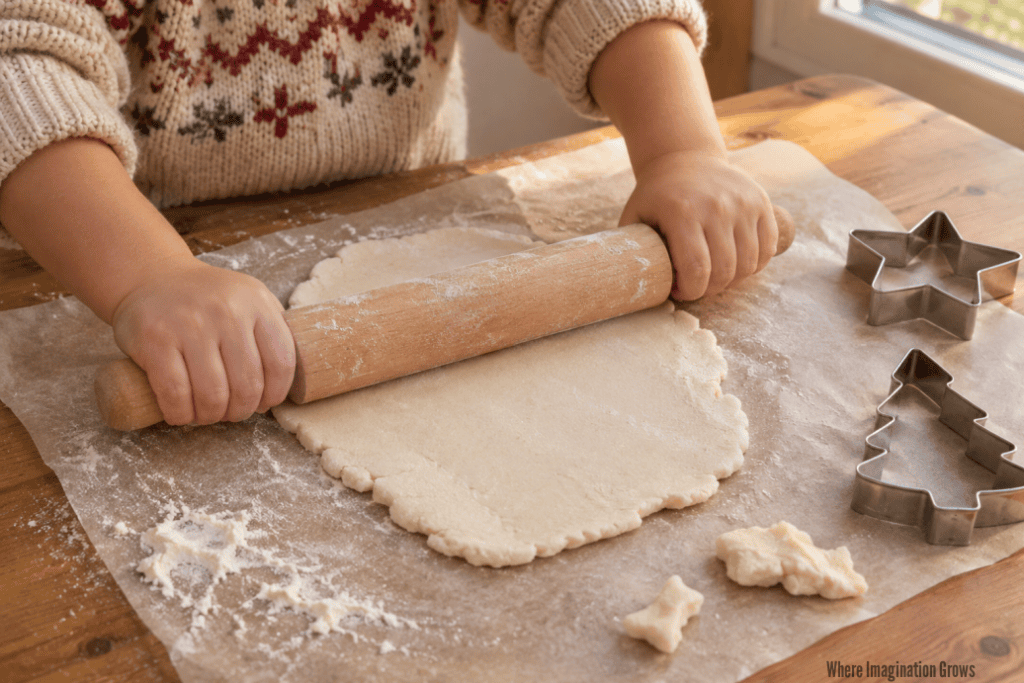
Place the dough on a clean surface and roll it out evenly. Aim for a thickness that feels sturdy enough to hold its shape. Very thin dough can crack, especially when you add several openings for beads.
3. Cut out the ornaments
Use cookie cutters to cut out Christmas shapes. We made trees and stars, but you can try any shape with enough room for bead openings. Transfer the dough shapes to a baking tray.
4. Cut out bead openings and hanging holes
Use a drinking straw to make small round openings in the dough. These will hold the beads and let light shine through the finished ornament.
Leave enough dough between each opening and around the edges so the shape stays sturdy. Add one separate hole near the top of each ornament for the ribbon. Make sure this hanging hole doesn’t get filled with a bead.
5. Arrange the beads
Place a translucent bead in each opening. Kids can choose the colors and arrange them like Christmas lights. Try alternating colors, repeating a pattern, or letting each child design their own ornament.
The beads should sit inside the cutouts rather than rest on top of the dough. Don’t overfill the openings, and keep the dough thick enough around them to help prevent cracking.

6. Bake the ornaments
Follow the bead manufacturer’s instructions for heating the beads, and have an adult monitor the process the entire time. In our original batch, we first dried the salt dough at 200°F for about 1½ hours, then carefully raised the oven temperature to 375°F until the beads melted. Those temperatures reflect the materials we used and aren’t a universal guide for every type of bead.
Let the ornaments cool completely before picking them up. The melted beads and tray can remain hot after they come out of the oven.

7. Add ribbon and display
Once the ornaments are completely cool, thread ribbon or string through the hanging hole and tie a loop. Hang them on the Christmas tree where light can shine through the colorful beads.

Tips for Making Bead-Filled Salt Dough Ornaments
- Choose translucent beads. They allow more light to pass through than opaque beads.
- Keep the dough sturdy. Leave plenty of space between bead openings and around the edges of each shape.
- Make the hanging hole before baking. Cutting it afterward can be difficult and may crack the dough.
- Use a straw for round openings. Press straight down, then remove the small piece of dough from the straw.
- Let the ornaments cool fully. The beads and dough need time to set before you add ribbon or hang them.
- Paint only after cooling. The dough may bake to a warm golden-brown color. You can leave it natural or paint it after it has cooled and dried.
- Add keepsake details after the ornament is completely dry. Write the child’s name or the year on the back with a permanent marker or paint pen.
What Kids Can Do
Children can help with several parts of this project, depending on their age and abilities. They can mix the dough, roll it with help, choose cookie-cutter shapes, and arrange beads before baking.
Plastic beads are small, so supervise closely and keep them away from children who may put craft materials in their mouths. Adults should manage the oven or grill, handle hot trays, and tie on the ribbon after the ornaments cool.
Frequently Asked Questions
Can I use pony beads or tri-beads?
The original project used tri-beads, but pony beads may also fit the cutouts. Bead materials and heating instructions vary by brand, so check the package before choosing beads for this project.
Why use translucent beads?
Translucent beads let light pass through the openings. When the ornaments hang near Christmas tree lights, the colors appear bright and jewel-like.
Do the salt dough ornaments have to be painted?
No. You can leave the ornaments their natural baked color. If you want to paint them, wait until they are completely cool and dry.
How can I personalize these as keepsakes?
Let each child choose the shape and bead colors. Once the ornament is fully cool and dry, write the child’s name and the year on the back. Store it carefully between holidays so it can be enjoyed again next Christmas.
Can I make these without melting plastic beads?
Yes. If you don’t have beads with clear heating guidance, make salt dough ornaments with open cutouts and decorate the surface after baking. You could also try a no-melt Christmas tree suncatcher craft.

More Christmas Craft Ideas
- Easy Christmas Tree Ornaments from Glue
- Melted Bead Suncatcher Mobiles
- Christmas Tree Decorating on the Light Table
- Pipe Cleaner Christmas Tree Craft
- Browse More Christmas Activities for Kids
Originally Published December 2013; Updated November 2026


Looking for more crafts and activities? Check out our index for 100+ kids’ activities! Find activities by theme, materials, skills, age, and much more!
I love how you used a straw to cut out an area for the bead – these are beautiful!
How neat! We’ve made salt dough ornaments before but I’ve never seen them with the melted beads…so cool!
Can you tell me more about the beads? Can I find the at Michael’s Craft Store?
Thanks.
The beads are just regular pony beads from my crafts stash. I got them at Wal-Mart in the craft section for about $2.50, but I’m sure that Michael’s would have something similar.
This has such a gorgeous result! I would have never thought to put the two together! What a clever, pretty and affordable craft! 🙂
These are beautiful! I think I’m going to give them a go! Will the beads fusing to the tray be a problem? I don’t want any disappointed children!
I put mine on wax paper and had no problems with the beads sticking to the paper, they came right up but fused to the ornaments securely.
i really like just the hand print, would u still bake then the same. (no beads) has anyone tried sprinkling glitter on top?
The handprint we do each year. I do not bake it the same way as the melted beads. For regular salt dough keepsakes & ornaments I just cook them on 200 for about 2-3 hours. Any hotter and they may puff up rather than just drying out. I’ve never sprinkled glitter on them during the cooking process but we’ve added it after with mod podge.
Are you aware of any fumes is coming off of the beads When you cook them? I want to do this is a craft at my daycare where I am the lead teacher, But the director was concerned about any fumes that would be coming off of the beads when they melt….. I read that you experienced AE heavy smell when they were cooking…
I forgot to hit notify me of any posts! Can you please put your answer here so I know you answered me!?
The beads I had did omit a melting plastic smell, not overpowering with the first batch but it built with the second batch as was a definitely noticeable. I cooked them in two batches (6 first time & 7 the second time), one right after another and the second batch was the one I had to pull out so I’m thinking if I had done them all at once it would have been less of an issue. Multiple people have msg’d me that theirs did not smell so its possible it was just my beads (basic pony beads from Walmart) so that may be a factor. I don’t think it would have been a problem if I could open a window or two but it was a very cold day and my playroom is off the kitchen so I didn’t want to make the kids freeze 🙂 Hope that helps!
What a great idea to change up salt dough ornaments. Thank you for sharing at Sharing Saturday!!