These mason jar Christmas tree luminaries are a fun way to turn a few simple craft supplies into a glowing holiday decoration. Kids can cover the jars with tissue paper, add their own paper Christmas trees, and choose battery-operated lights to make the colors shine.
We first made fall mason jar luminaries and decided to try a Christmas version. I originally thought colored tissue paper would make the jars look like they were glowing with Christmas lights. The kids had another idea: they chose blue and white tissue paper because they thought it would look like snow. Their snowy jars turned out really cute, especially with a strand of battery-operated lights inside.
This is an open-ended Christmas craft for kids. Each child can choose where to put the tissue paper and how to make their tree, so the jars don’t all have to look alike.

Materials for Mason Jar Christmas Luminaries
- Clean, clear mason jars
- Mod Podge
- Tissue paper in your choice of colors
- Green construction paper
- Paintbrush
- Scissors
- Battery-operated tea lights or a short strand of battery-operated Christmas lights
- Wet paper towel or wipes for sticky hands
- Decorations for the trees
We used blue and white tissue paper, but you can choose red, green, gold, or other colors. If you want a brighter, more colorful look, use deeper shades of tissue paper. Our light blue paper was subtle on the jar, so the kids added extra layers in some spots.
Ripping the tissue paper gives the pieces soft, uneven edges. It also lets younger children help with the preparation. Children who are ready to use scissors can cut the paper instead.
How to Make Mason Jar Christmas Tree Luminaries
1. Prepare the paper
Tear or cut the tissue paper into small pieces. Cut simple Christmas tree shapes from green construction paper. You can make one larger tree for each jar or cut small triangles for children to arrange into a tree.
It can be helpful to have the paper ready before you bring out the Mod Podge. That way, kids can start decorating while the Mod Podge is wet.
2. Add tissue paper to the jar
Brush a thin layer of Mod Podge onto one small section of the jar. Press tissue paper pieces onto the wet area, overlapping them slightly to cover the glass. Continue around the jar a section at a time.
Mod Podge can dry fairly quickly, so it’s easier to work in small areas instead of coating the whole jar at once. Keep a wet paper towel or wipes nearby. Little hands can get sticky, and sticky fingers make it harder to pick up and place the tissue paper.
Some children may like to carefully choose a spot for each piece. Others may prefer to place the tissue paper wherever it fits. Both approaches work well for this craft.
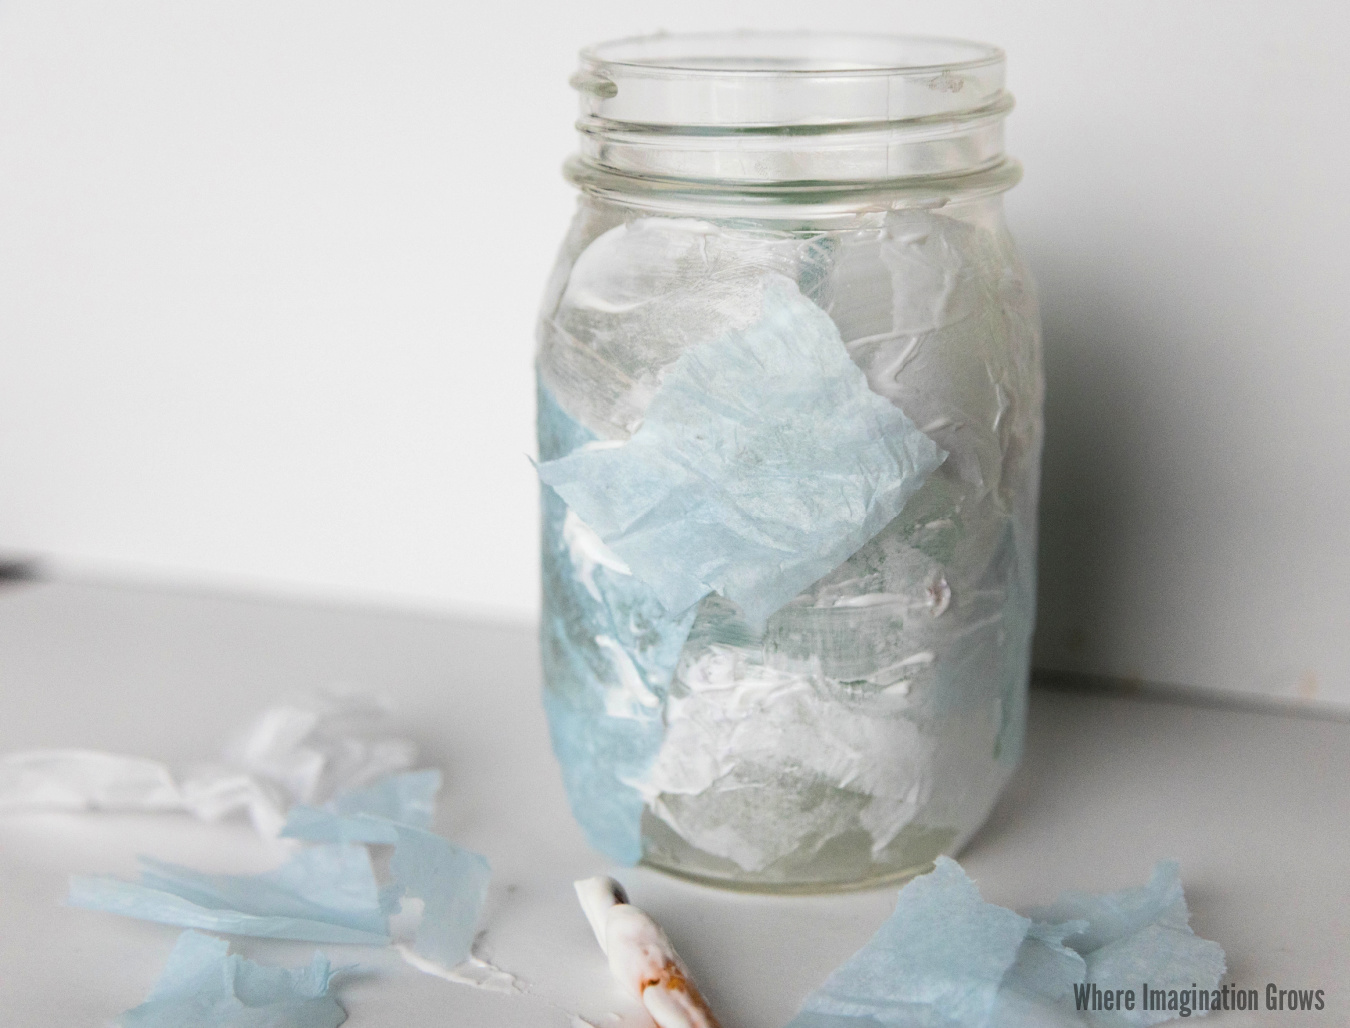
3. Add a Christmas tree
Once the jar is covered with tissue paper, add a tree shape on the outside. Brush a little Mod Podge onto the back of the construction-paper tree, then press it onto the jar.
Children can use one large tree shape or build a tree from paper triangles. When we made these, some of the preschoolers cut their own shapes, while older children helped cut triangles for younger ones.
4. Check the paper and let the jar dry
Let the jar dry. If any tissue-paper edges are lifting or spots aren’t fully covered, brush a little more Mod Podge over them. Allow the jar to dry completely before adding a light.

5. Add battery-operated lights
Place a battery-operated tea light or a short strand of battery-operated Christmas lights inside the jar. We used a strand of lights, which helped the pale blue and white tissue paper stand out.
Battery-operated lights make it easy to enjoy the luminaries without putting an open flame inside a paper-covered jar.

How to Customize Your Mason Jar Luminaries
The colors and tree shapes are easy to change. Use red, green, and gold tissue paper for a traditional Christmas look, or choose blue and white for a snowy winter design. Children can also layer several colors, add more than one paper tree, or make each side of the jar look different.
Decorate the Christmas trees
Cut a small star from yellow or gold construction paper or use star stickers for the top of each tree. Cut small circles from red, blue, and gold paper to use as ornaments. You can also use small round stickers or the leftovers from a hole punch for the ornaments.
Brush a little Mod Podge onto the back of each paper decoration and press it onto the green tree. Let the decorations dry before adding the lights. For younger children, cut out the stars and circles ahead of time so they can choose where to place them.
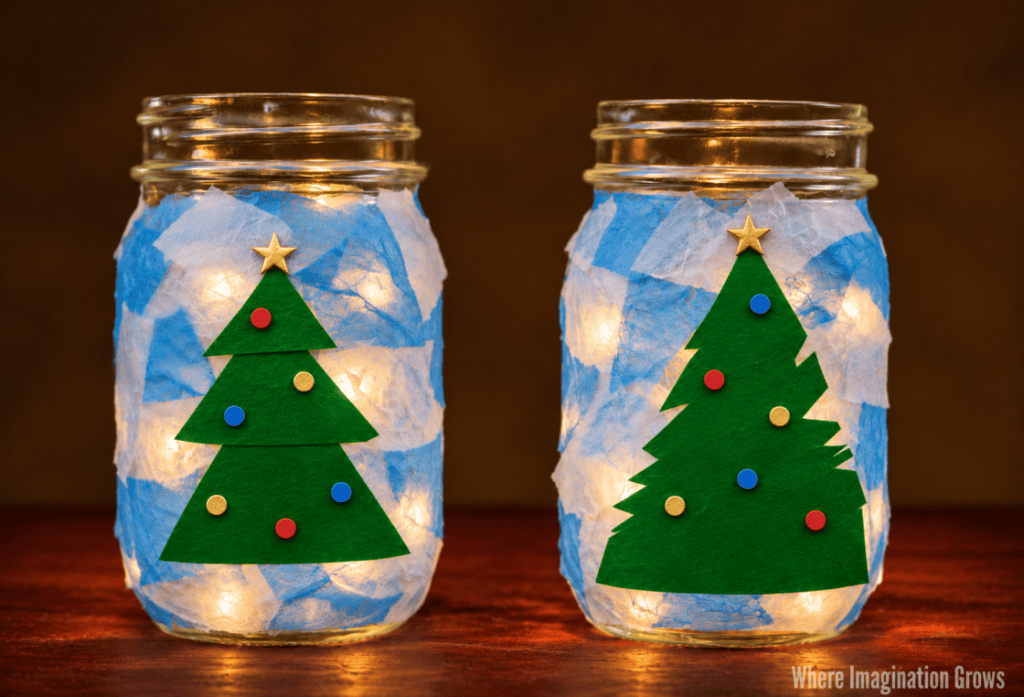
Add different color lights to the jars!

Tips for Making This Christmas Craft with Kids
- Put the tissue paper pieces in a small pile so children can choose their colors.
- Offer ripping as an option for children who are still learning to use scissors.
- Have the paper trees ready ahead of time if you’re doing this with a group.
- Let children decide whether to use one tree shape or build a tree from triangles.
- Work in small sections so the Mod Podge stays wet while children add tissue paper.
- Have an adult handle the glass jars, and supervise children throughout the activity.
- Use battery-operated lights with this craft.
These luminaries look festive grouped together on a shelf or table. The kids enjoyed seeing their jars light up, and each one had its own mix of colors and tree shapes.
If you try these mason jar Christmas tree luminaries, I’d love to hear what colors your kids choose!
More Christmas Crafts and Activities for Kids
- Mason Jar Fall Tree Luminaries
- Pipe Cleaner Christmas Tree Craft
- Christmas Tree Decorating on the Light Table
- Christmas Fingerplays and Songs for Preschoolers
- Browse all Christmas crafts and activities
Originally Published December 2022; Updated December 2026



Looking for more crafts and activities? Check out our index for 100+ kids’ activities! Find activities by theme, materials, skills, age, and much more!